Thursday, December 15, 2016

Holiday Shenanigans at School!

The teachers had a holiday door decorating contest: Here are some of my favorites...


Meanwhile in the art room...Second graders are working on Romero Britto inspired Christmas Trees. This year I have absolutely fallen in love with his art and the positive message he sends to people, to spread love and happiness. Here is my new bag found on his website! Technically its a messenger bag, but for us art teachers, those are basically purses!

And some of the students work:


And my personal favorite!

 Most classes only had one class to work on these- but this guy's class had 2 days! Click the link to Cane Ridge Elementary's ARTSONIA page to examples of this lesson and so much more!
Happy Holidays!


Wednesday, December 14, 2016

Glaze Recommendation!

When a teacher puts together a supply order, especially on a tight budget, it can be very scary! If you are one of the lucky ones that has a kiln and a budget large enough to teach clay it can be even scarier!


There are a LOT of glazes to chose from on the market. First of all it is important to make note of the temperature you are firing your kiln at. More than likely in a school setting you are using low fire clay and glazes, which is cone 05/06.


If you try to fire a piece with a mid or high fire glaze on your piece, and you are only going up to 05/06 then your glazes will not mature- or become shiny. If someone tries to fire LOW FIRE clay to HIGH or MID temperatures, then the clay will melt in the kiln - completely destroying your kiln!


Make sure that the glazes you purchase are low fire glazes. Next make sure that they are MAYCO foundations opaque. These glazes are the easiest to manage and give the best results on your students final pieces. The colors are bright and also easy to distribute. I cannot say enough good things about these!!!


After a year or two, some glazes chunk up inside the containers, and are especially hard to stir and distribute if they have pieces of glass or crystals in the glaze to give them. This is not the case with Mayco's foundations. I can leave a bottle on the shelf over the summer, come back and give it a quick shake and it is good to go. No stirring required!!!!!


The colors also work similarly to underglazes where they do not run or mix together, but you do not need to add the clear coat after your students finish painting! This is a glossy glaze. You will need to encourage students 2-3 coats, usually I only tell my students 2 and it is plenty!


When I taught clay at Cheekwood Botanical Garden and Arts Museum for 3 summers, these were the glazes that were in the studio. I absolutely fell in love with them and use them in my own elementary classroom now. I even get them through my clay sells man locally for under $10 a pint!!!! Super reasonable!


So if you are struggling with "What glazes to buy," I highly recommend checking out Mayco's foundations!


Below are some pieces that were glazes using this marvelous product! Happy Glazing!


Monday, November 28, 2016

Videos for the Art Class

I love showing students videos about art, art elements, artists. One of my favorite series is "Getting to know the world's famous Artists."


A free resource that is not run by youtube- because I know many school districts do not allow the use of youtube at all- is the Frist Centers Artquest series!


Here is the link : http://fristkids.org/activities-videos


These are short minute and a half snippets about art elements, design, types of art, and artists. The students love them, and because they were made and aired in Nashville, some of my students are familiar with the series or the places that are shown in the video clips.


What are some of your favorite videos?


Art is all around you!


Image result for art quest

Monday, October 31, 2016

Happy Halloween!

My pumpkin won the library's character pumpkin decorating contest! Elmer for the win! 

Sunday, October 9, 2016

A few teacher hacks!


Just a few things that have completely changed my life this school year may seem simple, but this is the first year I've implemented them.

The first, is simply duct tape, which is awesome for all sorts of things. While visiting a friends classroom I noticed that she had a carpet for students for sitting on the floor- however students will pull up carpets edges, pull them apart, run and slide on the carpet, it can be a mess! This teacher friend of mine had her carpet taped down around the edges. Simple but effective! No more sliding, less distractions! In the photo below you can also see my duct tape line for students to line up on at the end of each class. Duct tape for the win!


Another great trick I recently figured out was using a squishy knee pad (typically used for gardening,) can be brought indoors and used when loading or emptying the dry rack! No more knee bruises. 


Monday, September 12, 2016

Mehndi Hands: A cultural lesson

Teaching where I teach in Antioch Tennessee, it seems like an unusual spot for a diverse community yet we have three translators on staff and multiple languages spoken throughout our school. I love our crazy mix of cultures at our school and it often inspires me to teach lessons that feature some of the cultures that we have in my art lessons.


There have been several occasions when I've had young girls come in with Henna/ Mehndi paint on their hands. Woman in several middle eastern cultures use Mehndi in celebration in honor of wedding ceremonies.
Image result for mehndi
Last year I discovered this fabulous children's story book called Nadia's Hands. The story itself about the girls feelings of going to school after having the Mehndi on her hands made her very scared to have it done to her. In the end, she was proud of it, and who she was, a young girl from Pakistan.


I chose to do this with fourth grade, and tied it in with printmaking. The students learned about how different symbols used in the Henna paint represent different things. 
 
¢Flowers: Joy and Happiness


¢Sun, Moon and Stars: Deep and everlasting love


¢Water: Human emotion


¢Vines/Leaves: Devotion


¢Diamonds: Enlightenment


¢Square: Stability

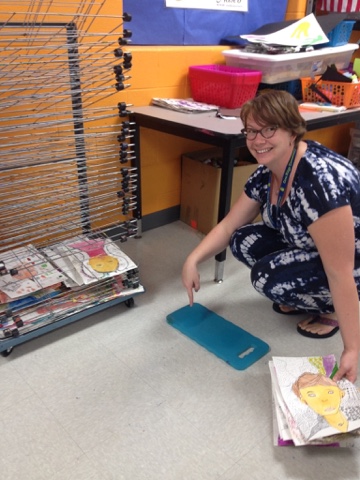
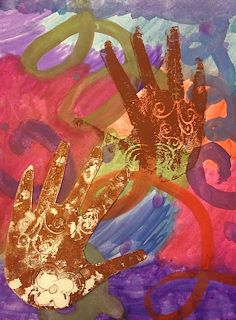
The students first painted their background of their papers using soft watered down tempera cakes. Then they were each given a Styrofoam plate which they traced their hand onto. Once their hand was traced, they designed their Mehndi on the hand using inspiration from the above listed symbols, zentangles, and other images that were meaningful to them. I even had a male student who drew a pokeball in the middle of the palm of his hand- it made it more personal to him! Then we used brown ink, and printed the hand on one side of the paper, and hot glued the Styrofoam to the other side so that the hands appeared to be a matching/ symmetrical pair.


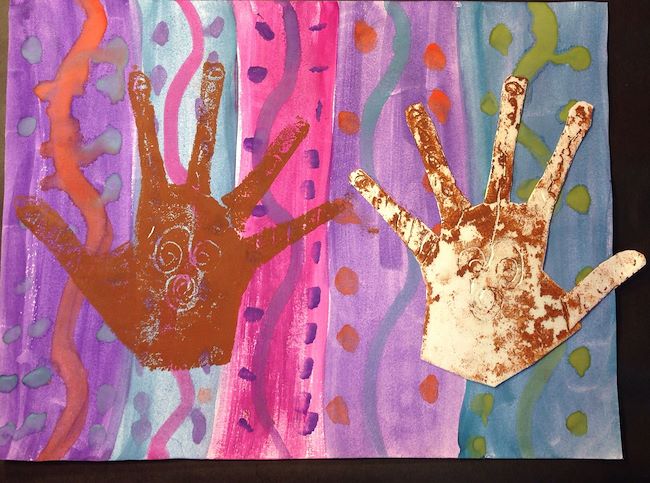
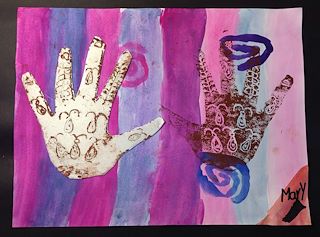
***If I were to do this again, which I loved the lesson, however the results could have been better! I would try again using an actual printing foam purchased from a supplier rather than the plates from the dollar tree. These plates are great for printing- however the ink did not stick to the foam itself once it dried. The ink flaked off leaving the foam hand portion looking bare. Some worked better than others, I'm not sure if I had a few different brands of foam plates. I would highly recommend testing your materials before using them.
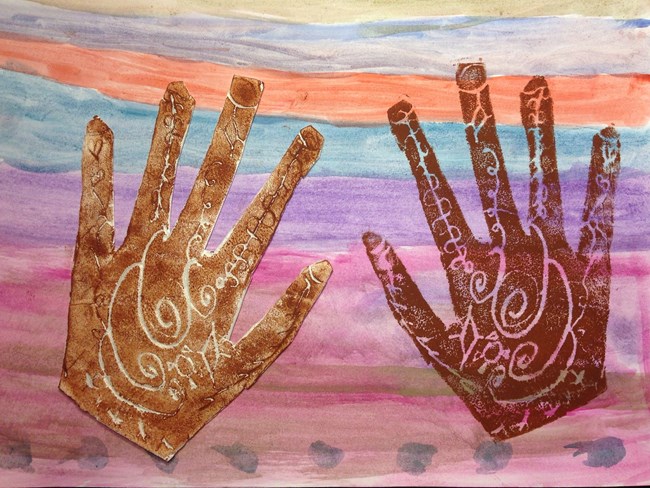
 Here are a few of the good ones!


Here's a few where the ink didn't stay as well...