So this summer I had the privilege of teaching at the Frist Center for the Visual Arts in downtown Nashville. I had such a blast, especially since the most recent exhibition to come on display while I was teaching was
Warhol Live. This gave me the opportunity to explore some fun Warhol inspired art lessons. I think my favorite was the Warhol Portrait lesson that I did...
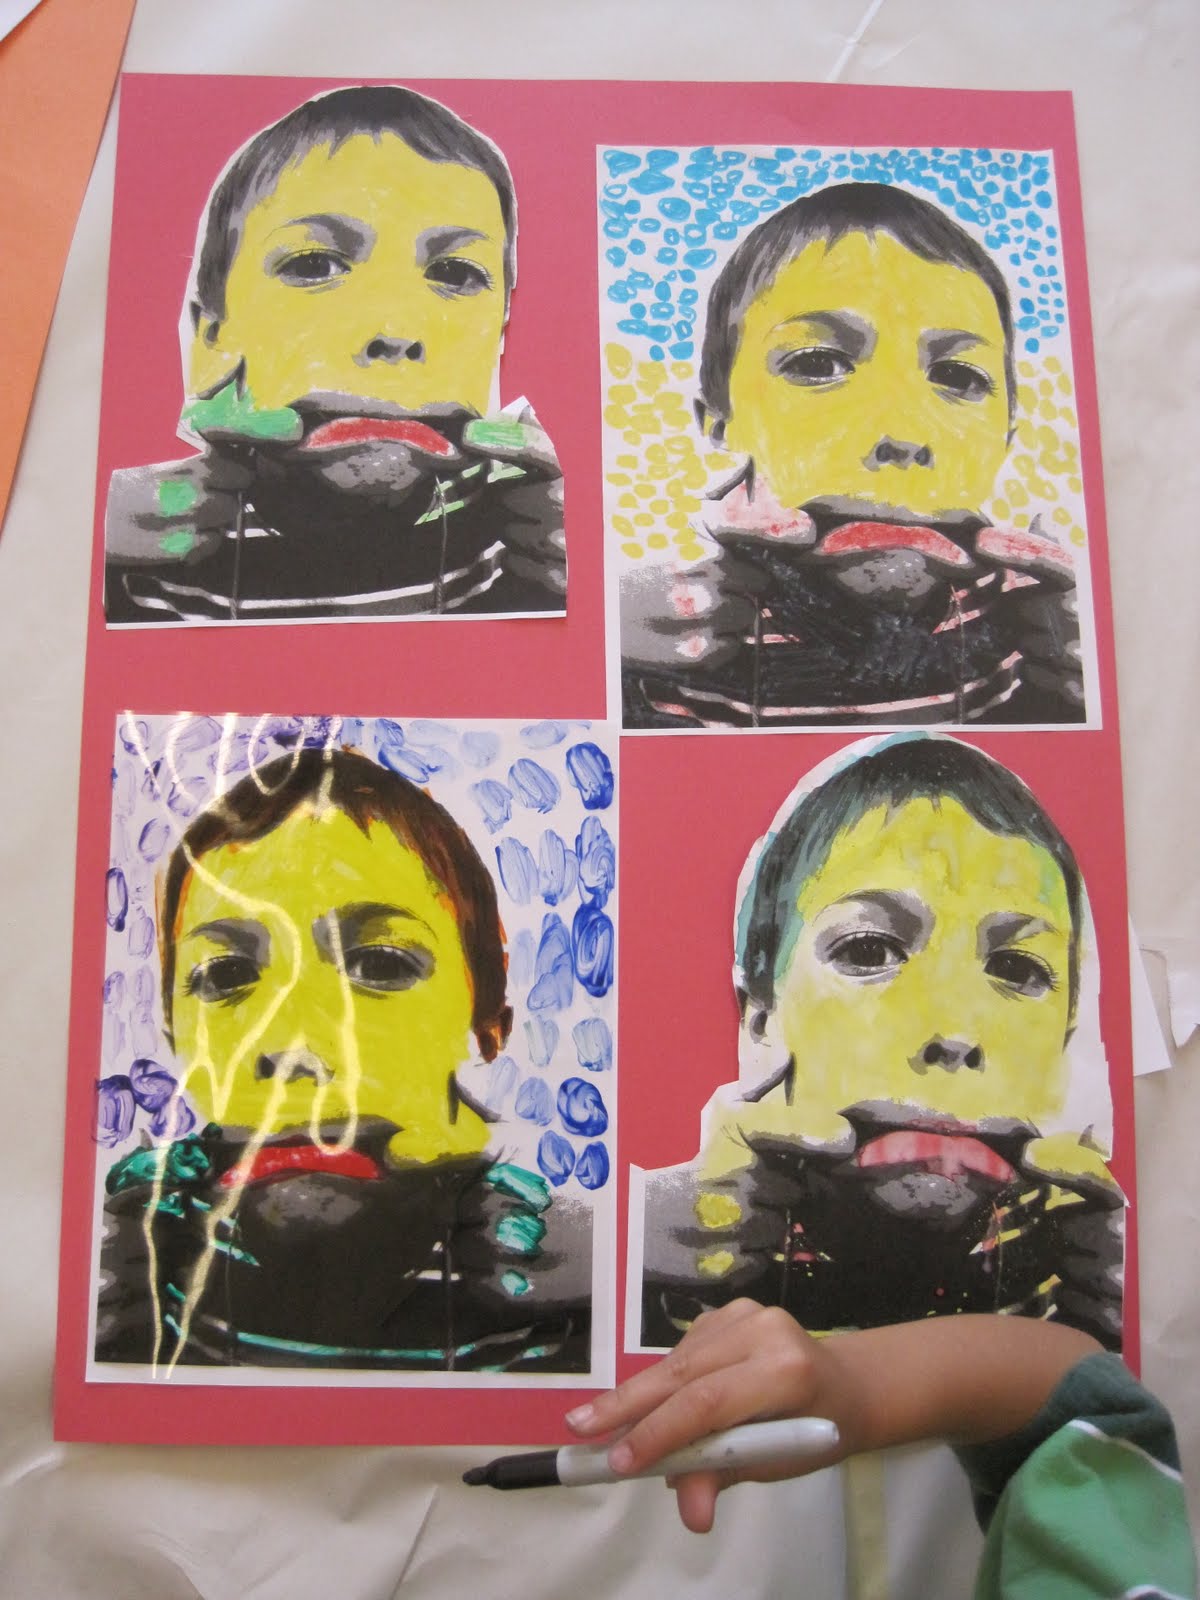
First I took a photograph of each student, then using photoshop, I turned those photos into black and white, elevated the contrast, and finally posterized. Then I printed out 3 photocopies of each kiddo, and one copy on a transparency. The students got to color these photos first using the crayola get fx markers, then using crayons with watercolor, and finally they got to chose their own media for their third. I know coloring isn't the most artistic thing to do with the students, but these were 5-7 year olds and it gave them the opportunity to see the different types of media and the marks those media can make. Lastly on the transparencies, the first week's group I had them use acrylic paint on the back of the transparency, so the image still faced the same direction as the rest of the photocopies. I wasn't all that impressed with the results, so the second group I tried having them use oil pastels, and I liked the results better.
Teaching this summer was a great opportunity for me to experiment and inspire me to create lessons for my kiddos this fall. Here are some of the results!